Table of Contents
Approving a custom pin proof can feel a little nerve-wracking. It’s not just a preview—it’s your ultimate safety net before the factory starts molding metal. Miss a tiny typo or a wrong color code here, and you’re stuck with it.
To make sure your project comes out flawless, you need to know exactly what to look for. In this guide, we’ll walk you through how to review your VeperPins proof step by step.
What Is a Custom Pin Proof?
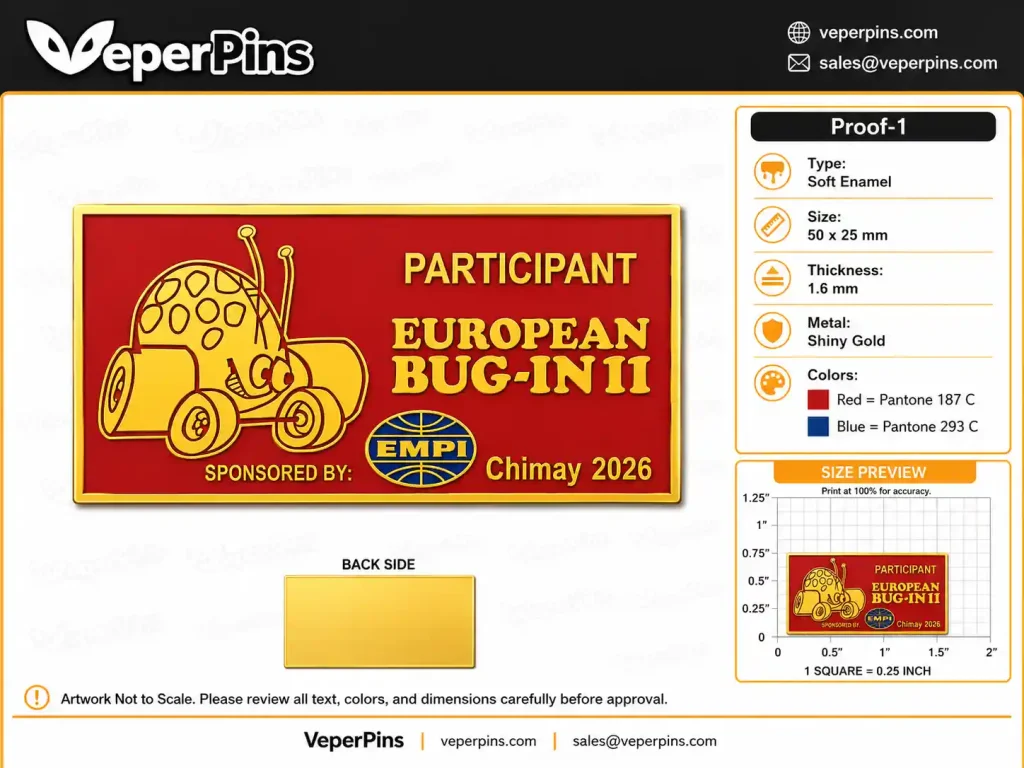
A custom pin proof is the approval artwork we create based on your idea, logo, or sketch. It usually includes the front and back design, enamel colors, plating details, and other important order information.
Please note that this is not a photo of the final product. Since each pin has to go through several manufacturing steps, the artwork is only a flat design file for you to review and approve before we move forward.
Why Reviewing Your Pin Proof Matters
Before you approve your proof, we recommend taking a few minutes to look over every detail. It may seem like a small step, but it can save a lot of trouble later. After all, your pin is custom made for you, so every detail should be right.
This helps catch things like misspelled words, wrong colors, size misunderstandings, or missing logo details. Once production is finished, these issues are much harder to fix and could affect the whole order.
Now, let’s go through each step one by one.
Check the Overall Pin Design First
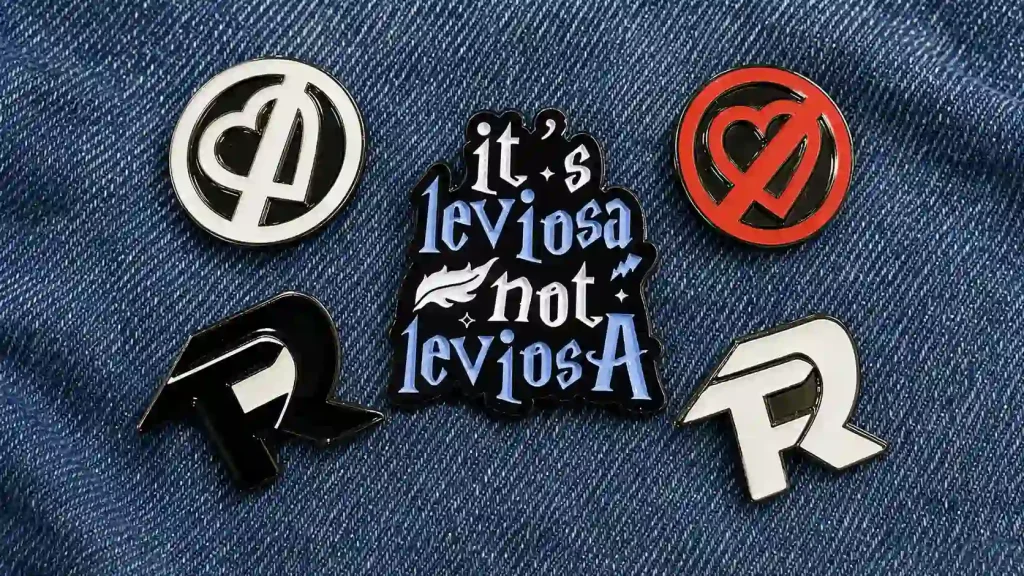
Start by looking at the overall pin design.
Make sure the logo is correct, the artwork is facing the right direction, and the shape looks the way you expected. Also check if there are any obvious design issues that need to be adjusted before moving on to the smaller details.
Review the Text and Spelling Carefully
Double-checking your text is arguably the most critical step. Meticulously review all names, dates, company branding, and copy.
Since your text is engraved directly into a physical metal mold, typos are permanent. Fixing a mistake post-approval means scrapping the mold and starting over—which is expensive and completely derails your timeline.
We’ve seen this happen, especially with AI-generated designs where a “G” subtly morphed into a “C.” It slipped right past approval, and the entire batch had to be remade from scratch.
Bottom line: Read every single word at least three times before giving the green light.
Confirm the Pin Size
Because our proofs are vector files, they stay crisp no matter how much you zoom in. This can be misleading, making it easy to forget the pin’s actual physical size. That’s why double-checking the dimensions before final approval is crucial.
The easiest way to get a feel for the size is to use a coin for reference. A 1-inch pin is roughly the size of a quarter, while a 1.25-inch pin is closer to a half-dollar. Holding a coin in your hand is way more accurate than just staring at a screen.
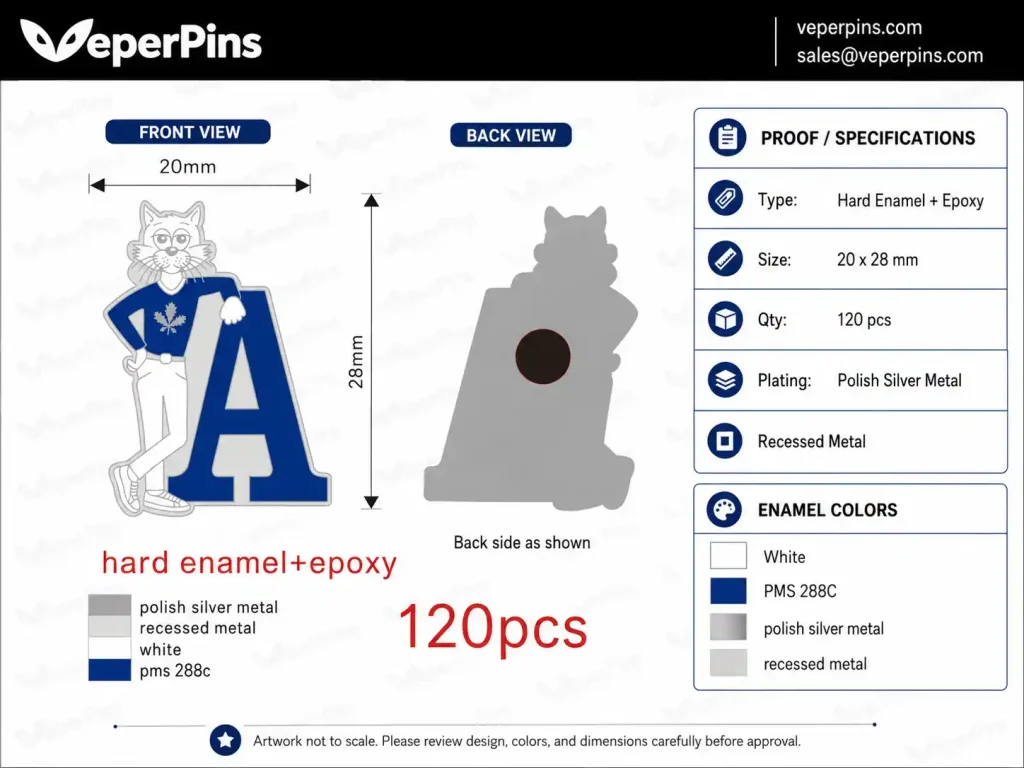
Also, keep an eye on the unit conversion. You likely ordered in inches, but our production blueprints use millimeters (mm). Double-check the dual-unit labels on the proof (like 1 inch = 25.4 mm) to make sure we’re on the same page and prevent any sizing errors on the final product.
Check the Colors
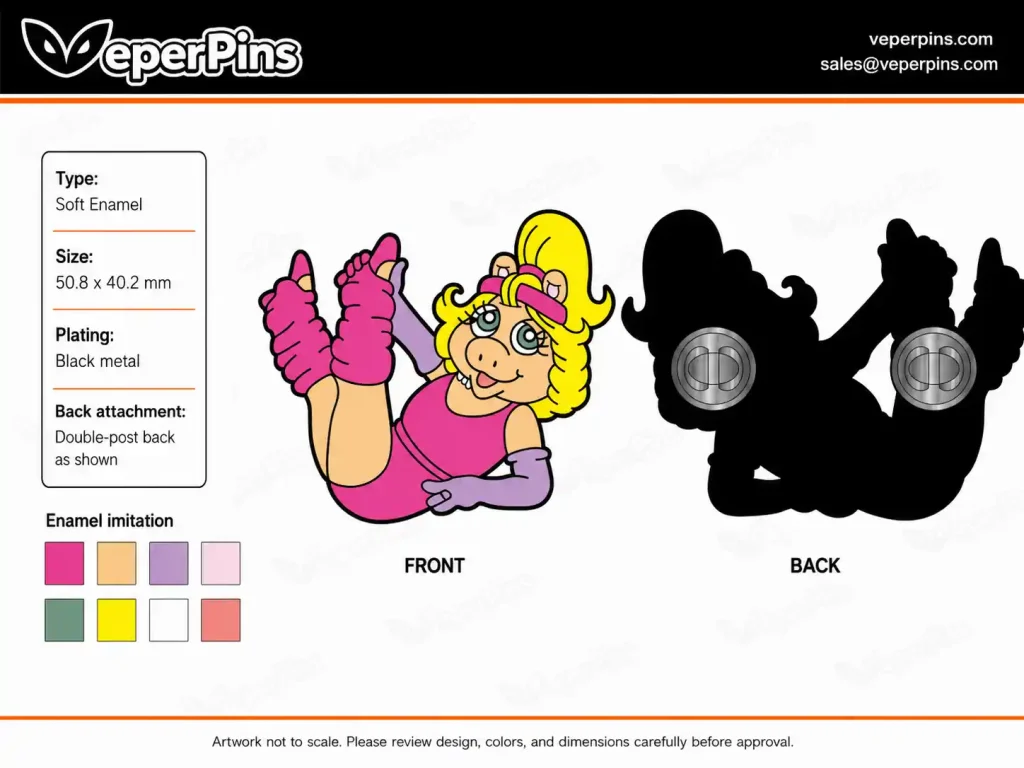
If you’re ordering enamel pins, your proof will show specific Pantone (PMS) codes. Make sure they actually match your brand colors. If a shade looks a bit off on your monitor, just look up the right code on Pantone’s website and send it over. (Same goes for printed pins—double-check that the printing style is what you expected).
One important reminder: digital screens lie. Every phone and monitor displays colors and brightness differently, so what you see on a screen will never perfectly match a physical pin. That’s just how the manufacturing industry works, no matter who you buy from.
Confirm the Metal Finish
Next up is the metal finish. But let’s be honest—a 2D digital mockup can never truly capture the shine and texture of real metal.
So here’s the trick: ignore what the colors actually look like on your screen. Instead, look directly at the text labels at the bottom of the proof (like Shiny Gold or Matte Nickel) to make sure they’re correct.
If you have no idea what a specific plating looks like in person, just ask your supplier to send over a few quick photos of real pins they’ve done in that finish.
One thing to keep in mind: plating standards vary from shop to shop, especially with antique finishes. Take Antique Nickel, for example.
One factory might make it look much darker and heavily distressed, while another might deliver something that looks a bit closer to antique silver.
Check the Special Add-ons
If your design includes upgrades like glitter, glow, translucent enamel, or epoxy, this is where things easily get mixed up. These aren’t just colors—they completely change the physical texture of the pin. Keep an eye out for these four details:
- Glitter Enamel: Make sure the “Glitter” label is only on the exact sections you want to sparkle. You don’t want to open the box and realize your entire pin turned into an accidental disco ball.
- Glow-in-the-Dark: Don’t just stare at the daytime mockup. Double-check that the “Glow” tag is actually pointing to the right spots—like the text, eyes, or stars—and not the background by mistake.
- Translucent Enamel: This stuff lets the metal texture show through underneath, which looks completely different from regular solid paint. Ensure those specific areas are explicitly marked “Translucent” so they don’t get misread as standard colors.
- Epoxy Coating: This clear dome gives a smooth, glossy finish, but it will flatten out the metal’s natural recessed feel. Make sure “Epoxy” is written on the proof, and decide if you want it covering the whole pin or just a few sections.
Check the Back and Attachments
The back of your custom pin is just as important. First, you need to make sure the attachments match exactly what you expected. Keep an eye on these two details:
- Backing and Attachments: Confirm whether your butterfly clutches are metal or rubber, and what color they are. If you’re using magnets or safety pins instead, make sure they are placed correctly. Just a heads-up: larger pins usually need two pin posts, otherwise they will constantly spin around on your clothes. Check the proof to make sure two posts are drawn in the right spots.
- Backstamp and Engraving: If you added a molded logo, website, or laser-engraved numbering to the back of the pin, double-check that nothing is misspelled and that the placement is exactly where you want it.
Ask Questions Before Approving the Proof
If this is your first time ordering custom pins, it’s completely normal if the digital proof looks a bit different from what you had in mind. Looking at that flat image on your screen, you’re probably sitting on a bunch of questions:
- “Is this tiny detail actually going to come out clean?”
- “Is it too late to switch the metal plating color?”
- “Can we tweak the text size or shift the placement a bit?”
- “I wanted soft enamel for that classic, textured look—so why does this drawing look totally flat? And what do all these cryptic labels even mean?”
Don’t sweat it—we totally get it. To be honest, when I first started out in this industry, I was just as lost. Everything looked confusing.
That’s exactly where Veperpins comes in. If there is anything you don’t understand or feel unsure about, the easiest shortcut is to just ping your representative. Don’t worry about bothering them. No matter how small the question is, they’ll break it down and walk you through every single detail until you’re 100% comfortable.
One last thing: don’t let the way a digital mockup looks throw you off. Every factory draws their 2D proofs a little differently. It might look stiff and flat on your monitor, but the final physical product will have that premium, high-quality feel you expect. Period.
The Ultimate Custom Pin Proof Checklist
Before you hit that “Approve” button, take just two minutes to run through these final sanity checks:
- The Big Picture: Does the overall design, logo orientation, and outer shape match exactly what you envisioned?
- The Critical Text: Spell-check the company name, individual names, events, and dates. Check it letter by letter, number by number. Don’t let a typo ruin the batch.
- Size Check: Don’t just glance at the numbers. Grab a physical ruler on your desk to visualize it—and make sure your inches and millimeters aren’t mixed up.
- Color Match: Ignore any screen color variance. Double-check that the actual Pantone / PMS codes written on the proof are correct.
- Metal Plating: Look directly at the text label at the bottom (like Shiny Gold or Matte Nickel) to ensure it’s the exact finish you wanted.
- Special Add-ons: Are the labels for glitter, glow, translucent enamel, or epoxy pointing to the exact right sections?
- Flip it Over: Did you get the right attachment (rubber clutch, magnet, etc.)? If it’s a larger pin, make sure you see two pin posts drawn on the proof.
- Backstamp: Check any molded logos, websites, or limited-edition numbering for correct spelling and placement.
- The Gut Check: Is there even a tiny detail you’re still unsure about, don’t understand, or want to change?
If everything looks solid, go ahead and approve the proof. We’re ready to send it straight to production!
One Final Check Before We Make Your Custom Pins
Reviewing your digital proof definitely takes some patience. However, locking in all the details before going into production guarantees the final quality of your batch and saves you a lot of time and back-and-forth later on.
We hope this guide from Veperpins clears up any questions you might have had about the proofing process.
Ready to order your custom enamel pins? Go ahead and submit your design today. We look forward to partnering with you and bringing your project to life!