
Table of Contents
After making custom enamel pins for a while, you may notice that many designs start to look similar.
Most of the time, it’s not the design itself — it’s just the standard finish, shape, and backing.
To make a pin feel more special, you can add small upgrades like glow powder, glitter, spinners, dangles, cut-outs, or transparent enamel.
Here are a few common enamel pin upgrades and when to use them.
1.Add Glitter or Glow
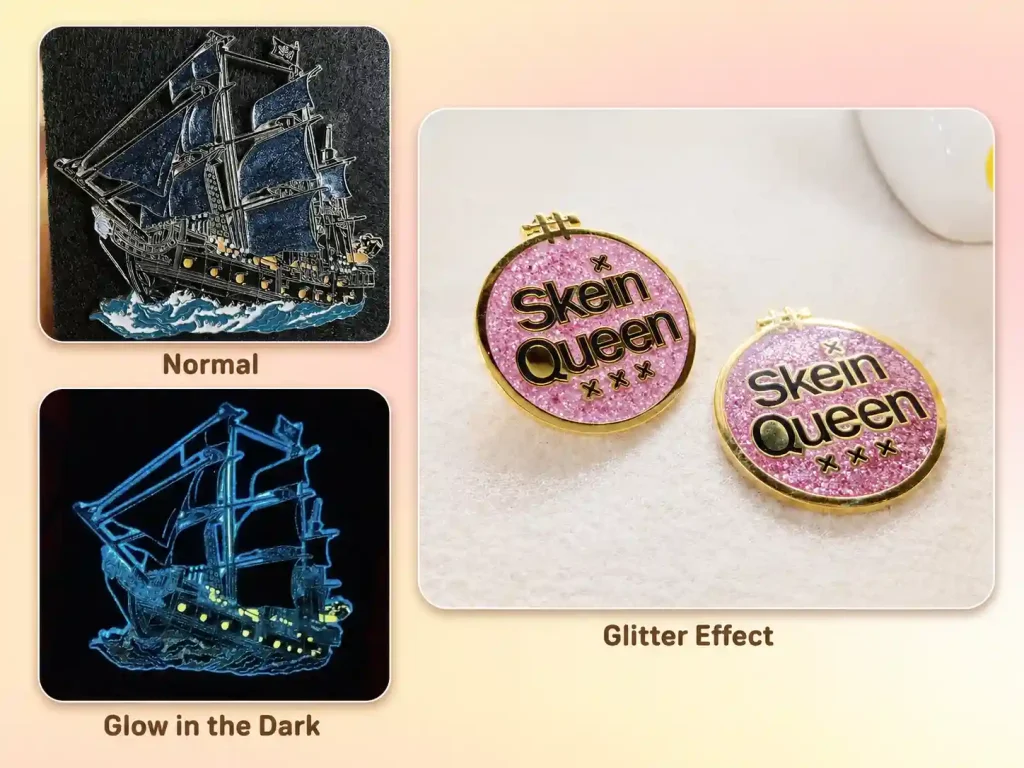
If you want your pin to look a little brighter under the light, you can add glitter powder into the enamel color.
After the glitter is mixed into the color, the pin will have a shiny effect from different angles. It works well for stars, magic designs, ice effects, music pins, anime pins, and other designs that need a little sparkle.
Soft enamel and hard enamel will also look a bit different. With soft enamel, the surface has a little texture, so the glitter effect can look more obvious. With hard enamel, the surface is smoother, and the glitter is sealed inside the enamel, so it looks cleaner.
Glow-in-the-dark powder is also a fun upgrade. It absorbs light during the day or under a lamp, then slowly gives off a soft glow in the dark. It does not need batteries or any power source.
If your design has moons, stars, ghosts, skulls, space, magic, or Halloween elements, glow powder is a good option. In normal light, it looks like a regular enamel pin. In the dark, it gives the pin a hidden extra effect.
2. Pin on Pin
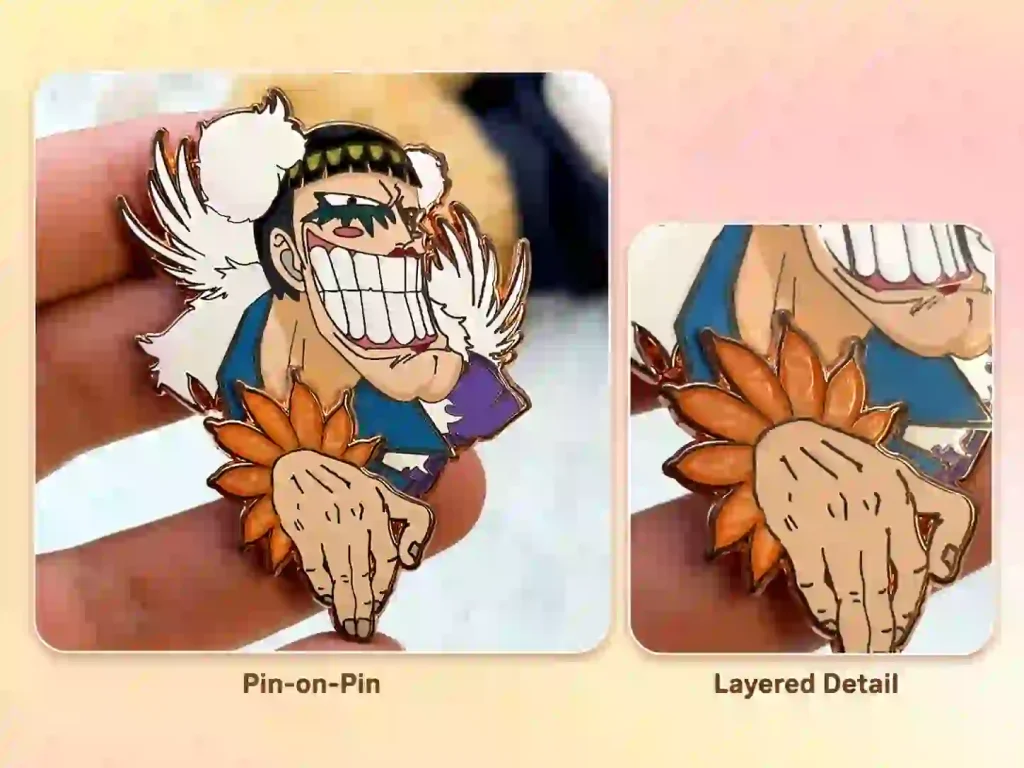
It is a double-layer enamel pin design. You can think of it as placing a smaller pin on top of a larger pin.
This makes the pin look more dimensional, and it also helps separate different design elements instead of squeezing everything into one flat layout. For example, the large pin can be the background or main logo, while the small pin can be a character, icon, number, or key detail.
Different layers can also use different finishes. For example, the larger pin can use hard enamel, and the smaller pin can use soft enamel. This gives the whole pin more depth and keeps it from looking too flat.
The two parts are usually assembled with posts, rivets, or sometimes magnets, depending on the design.
3. Spinner Design
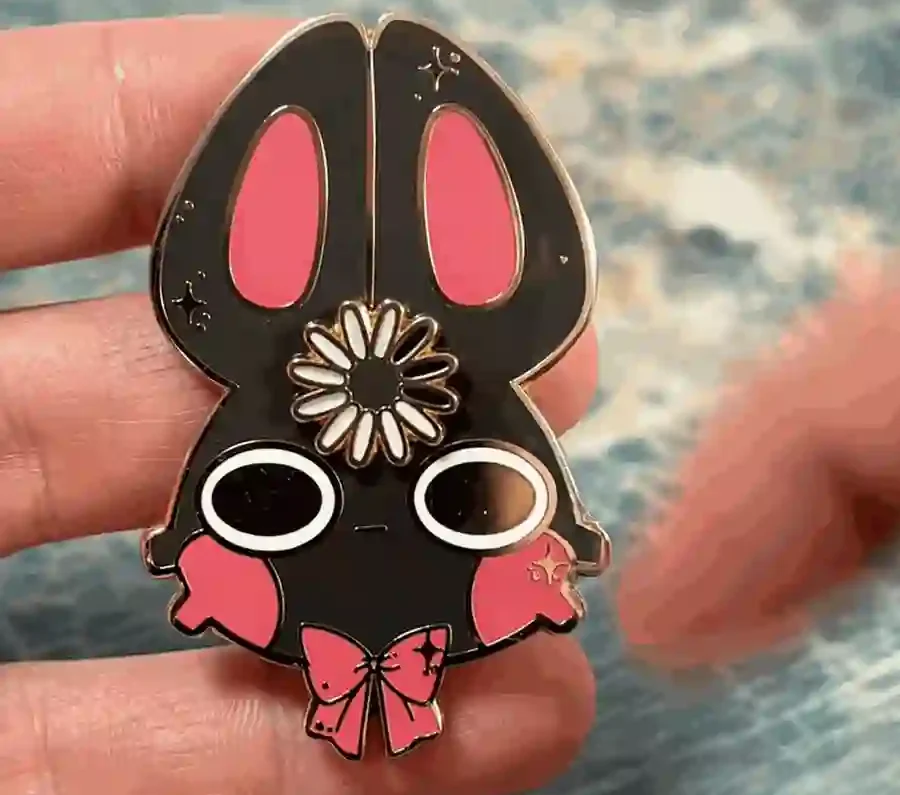
A spinner design is easy to understand. It means one part of the pin can move.
For example, the center piece can spin, the outer ring can rotate, or you can add a small arrow or wheel. When customers get the pin, they do not just look at it. Many people will naturally want to turn it with their fingers.
But spinner pins are not suitable for every design. They usually need two layers, with a rivet or small rotating part in the middle. So the pin cannot be too small, and the artwork should not be too crowded. Otherwise, the spinner may not turn well, or the design may look messy.
This type of design works better for artwork that already has a sense of movement, such as the sun and moon, planets, wheels, compasses, clocks, or game wheels. If done well, it gives the pin a little toy-like feel and makes it more fun.
4. Add a Dangle Charm
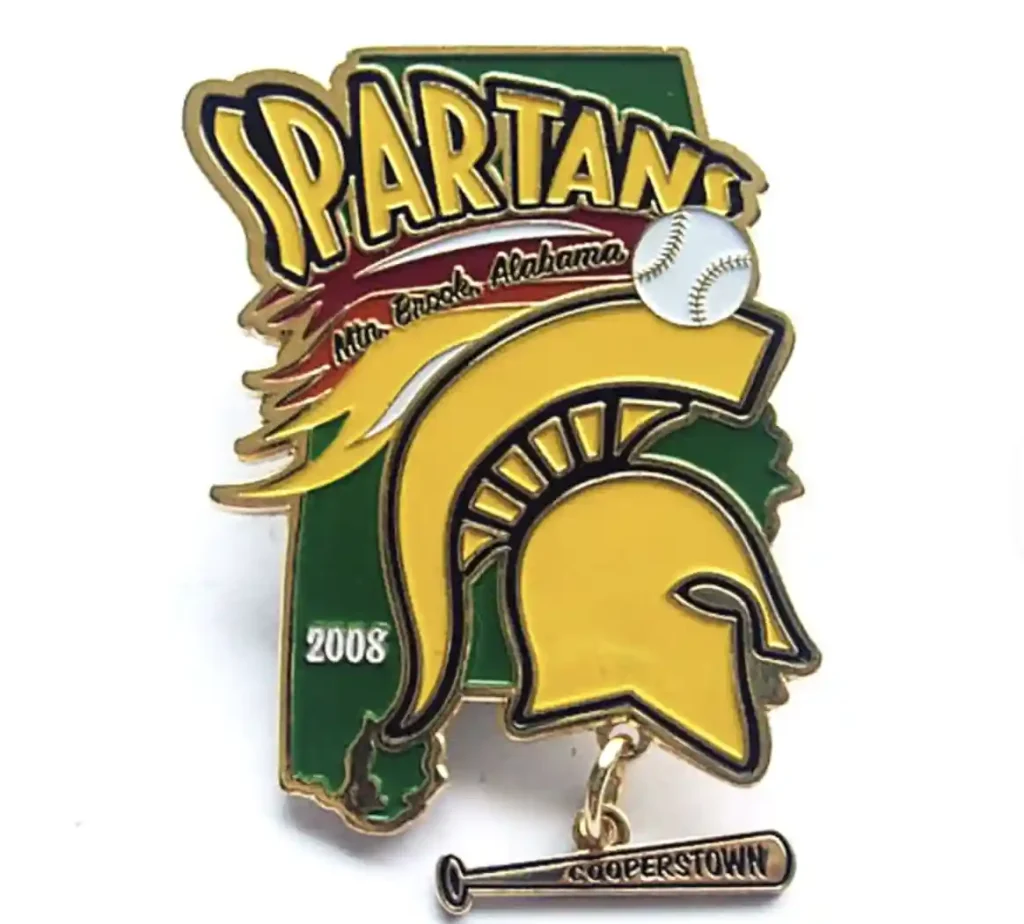
A dangle charm is like a small hanging piece under the pin. It can be attached to the bottom of the main pin.
It can be a small tag, icon, number, name, year, or decorative piece. This makes the whole pin look richer, instead of being just one flat design.
This style is very common in trading pins. For example, sports team pins often add player names, numbers, years, event names, or small charms like balls, stars, or mini medals.
When the pin is worn, the dangle charm moves slightly, which makes the pin look more fun.
If your design needs to show more information, but you do not want to make the main artwork too crowded, adding a dangle charm is a useful option.
5. Custom Cut-Out Shape
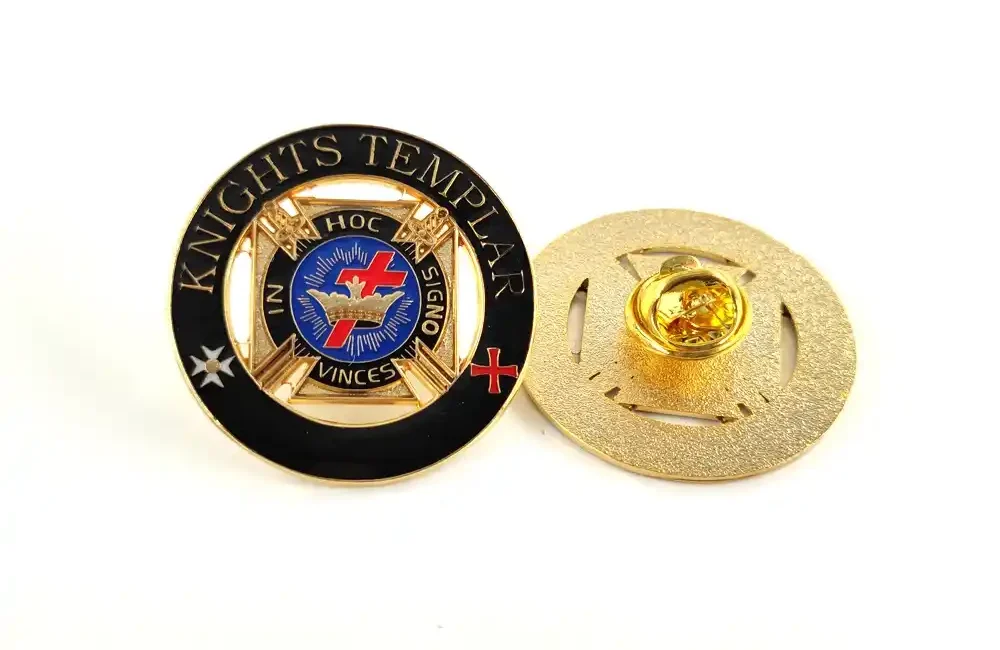
A cut-out means removing some metal areas from the pin to create open spaces or special shapes.
The good thing about cut-outs is that the pin will not look like one solid piece of metal. After leaving some open space in the design, the pin can look lighter and more layered.
Text, shapes, symbols, wings, flowers, and animal outlines can all work well with cut-outs. When the pin is worn on clothing, the fabric color can show through the cut-out areas, so the pin looks more interesting than a regular solid pin.
For larger pin designs, adding some cut-outs can also help reduce the weight, so the pin does not pull on the clothing too much.
But cut-outs are not always better just because there are more of them. Very thin metal areas can bend, and too few connection points can affect the strength of the pin. So before using cut-outs, we still need to check whether the design is suitable.
6. Add Transparent Enamel
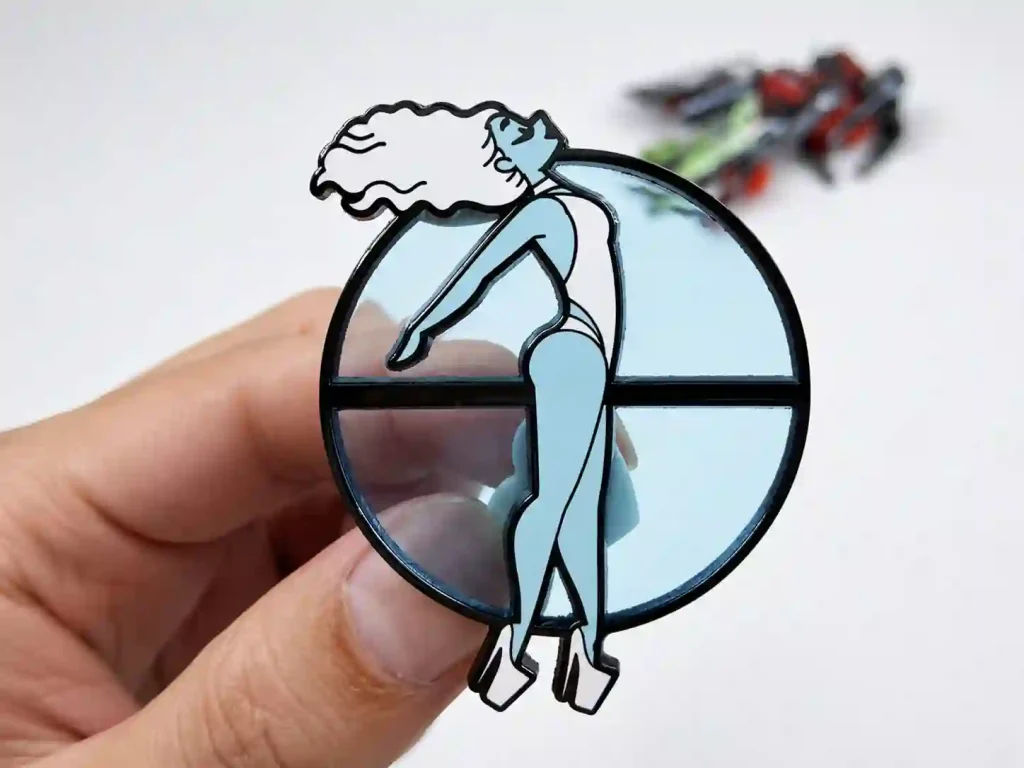
Transparent enamel is a clear enamel fill. It gives the pin a slightly shiny, glass-like look, similar to water, glass, or ice.
Not every pin needs it, but for some details, it can make the effect much better. For example, water drops, ice cubes, glasses, gems, drinks, and eyes may look a little flat if they are filled with regular solid color. Adding transparent enamel can make the color brighter and the detail more lively.
Another option is to fill transparent enamel into a cut-out metal area. This keeps the metal outline visible while adding a semi-transparent effect, which looks more special than regular solid enamel.
Transparent enamel does not need to be used on a large area. Many times, using it on one small detail is enough to make the whole pin look more refined.
Extra Cost for Custom Pin Upgrades
These upgrades can make your enamel pins look more custom, but they usually cost extra.
Here are the common upgrade costs:
| Upgrade Option | Approx. Extra Cost / Pin |
|---|---|
| Glow-in-the-Dark / Glitter Powder | +US$0.38 |
| Pin-on-Pin Design | +US$0.85 |
| Spinner Design | +US$0.73 |
| Add a Dangle Charm | +US$0.35 |
| Custom Cut-Out Shape | +US$0.20 |
| Transparent Enamel | +US$0.55 |
Prices are for reference only. Final cost may vary depending on pin size, quantity, and design details.
Start Your Custom Enamel Pin Project
Making custom enamel pins is a fun process. You can take a simple idea, add a few special details, and turn it into a pin that feels more personal and different from the standard designs.
Try adding glow powder, glitter, cut-outs, spinners, dangles, or transparent enamel to see how much these small upgrades can change the final look.
New to custom pins? You can also read our full guide to learn the basic process before starting your design.
Have an idea already? Contact us and we’ll help you check the best options for your pin.


