
Table of Contents
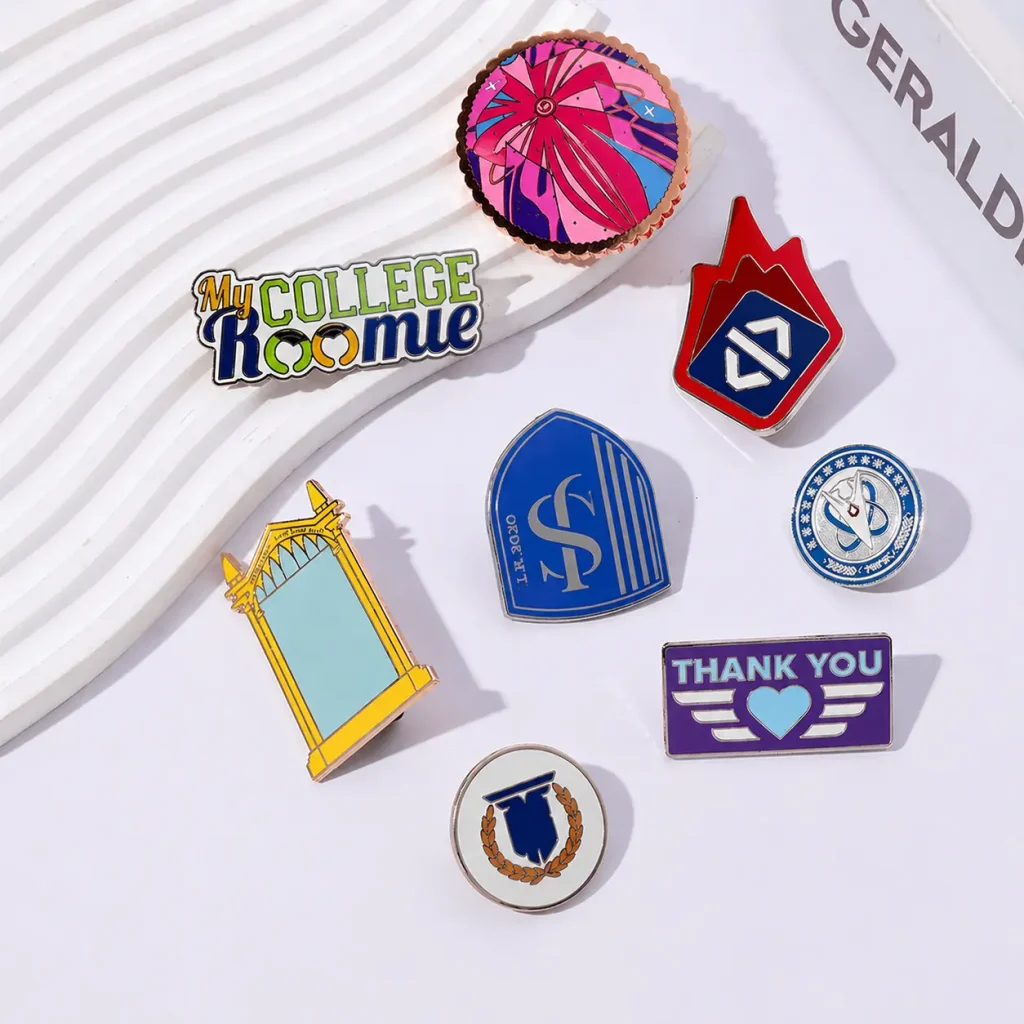
Custom enamel pins are one of the most popular promotional products for companies, Etsy shop owners, artists, clubs, and individuals. They turn creative ideas into small, durable metal accessories that can be used for branding, events, merchandise, or personal projects. Whether your design is a simple logo, a mascot, or a detailed illustration, the pin process can transform it into a professional-looking personalized product.
However, making enamel pins is not a simple DIY craft process. It requires professional equipment and a complete production workflow, including mold making, metal stamping, plating, enamel color filling, polishing, and quality inspection. Because of this, it is usually difficult to complete the entire process at home.
This guide will walk you through the full process step by step, helping you understand how a design becomes a finished product. When you are ready to place a custom order, you will be able to communicate more clearly with your supplier about the design, process, and detailed requirements, reducing unnecessary misunderstandings, revisions, and delays.
The Process of Making Enamel Pins
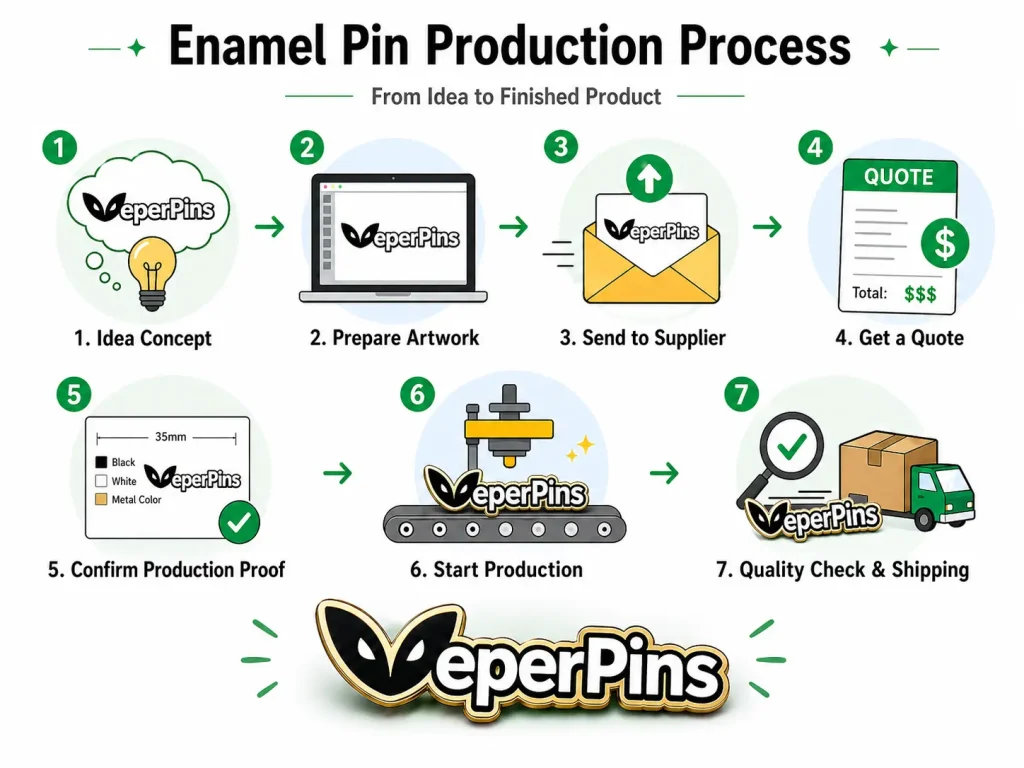
Because enamel pin production requires professional equipment and a complete factory process, most customers cannot make the entire product independently at home. Therefore, this section explains the complete process from a customer’s perspective, including developing an idea, preparing a design, finding a supplier, and placing an order. We will explain the factory production process in more detail later.
1. Clarify Your Design Idea
Every enamel pin starts with a clear idea. Before beginning the formal design process, you can first imagine what the finished pin should look like. For example:
Is it round, square, rectangular, or a custom irregular shape?
Should the logo or main design element be placed in the center, at the top, at the bottom, or around the edge?
Do you need to include text, a date, a brand name, a mascot, or a special graphic?
At this stage, you do not need to prepare a highly professional artwork file. As long as you have a general direction, such as the shape, theme, colors, and main elements, you will have a good foundation for the next design step.
2. Prepare an Initial Design Artwork
Once you have a basic idea, the next step is to turn it into a visual design. The artwork at this stage does not have to be perfect. It only needs to help the supplier understand your idea.
You can draw a rough sketch by hand, take a photo of it, and send it to your supplier. If you want the design to look clearer, you can also use Canva, Illustrator, Photoshop, or other design tools to create a simple layout.
For example, you can prepare the design in Canva like this:
Create a square canvas, such as 1000 × 1000 px.
Use circles, text, icons, and lines to build the general layout.
Mark the required colors, size, text content, and placement.
Export the file as a PNG, JPG, or PDF and send it to your supplier.
Today, many customers also use AI tools to assist with design creation. You can enter the style, theme, text, and colors you want, and upload reference images to let AI generate an initial design direction. This can help you build a basic concept faster, which can later be adjusted by your supplier or a professional designer.
Of course, the easiest method is to work directly with a professional enamel pin manufacturer that can help create the artwork for you. However, if you do not provide any reference at the beginning, the designer may need several rounds of revisions before getting close to your expectations. Therefore, we recommend preparing a simple sketch, AI reference image, or design description before contacting a supplier. This will make communication much more efficient.
3. Send Your Design to a Supplier
After completing your initial design, the next step is to find a suitable supplier. You can search for enamel pin manufacturers through Google, YouTube, Instagram, Facebook, Etsy, and other platforms. You can also contact local promotional gift companies for assistance.
When sending an inquiry, it is best to provide as much information as possible, including:
Design artwork or reference images
Estimated size
Estimated quantity
Preferred process, such as soft enamel, hard enamel, gold plating, silver plating, black nickel, etc.
Whether special accessories or packaging are needed
Target delivery time.
The more complete your information is, the more accurate the quotation and suggestions from the supplier will be. It can also reduce the time spent on repeated confirmations later.
4. Get a Quote and Choose the Right Supplier
After receiving your artwork and requirements, the supplier will provide a quote based on factors such as design complexity, size, quantity, number of colors, plating option, accessories, and packaging.
When choosing a supplier, you should not focus only on the price. A reliable supplier should offer reasonable pricing, professional design support, clear communication, stable product quality, and on-time delivery. This is especially important if you need bulk customization or have a tight deadline. Production capacity and response speed are just as important as cost.
You can compare quotes, previous work samples, communication efficiency, and lead times from several suppliers before choosing the one that best fits your project needs.
5. Confirm the Production Artwork
Once you confirm the price and are ready to place the order, the supplier will usually create a formal production artwork based on your design. This artwork serves as the main reference for mold making and production, so you need to check every detail carefully.
Important details to review include:
Whether the logo or graphic is correct
Whether there are any spelling errors in the text
Whether the colors match your requirements
Whether the size and shape are correct
Whether the plating, back attachment, and packaging method are accurate
Whether any details are missing or need adjustment.
This step is especially important if your design includes a lot of text, dates, brand names, or complex graphics. Once the production artwork is approved and the order enters the mold-making or production stage, later changes may cause extra costs or delays.
6. Start Production
After the production artwork is approved and payment is completed, the factory will begin making the enamel pins according to the final artwork. In general, the production time for a standard design is usually about 10–15 business days. The exact timeline depends on the order quantity, design complexity, and factory schedule.
If your design includes many colors, complex details, dual plating, high relief, special packaging, or other custom requirements, production may take longer.
We will explain the internal factory production process in more detail later.
7. Quality Inspection and Shipping
After production is complete, the factory will conduct a quality inspection to confirm that the finished pins match the approved production artwork. They will also check for obvious defects, such as incorrect colors, plating issues, scratches, loose attachments, or damaged packaging.
Once the products pass inspection, the supplier will arrange packaging and shipment. You will usually receive a tracking number so you can follow the shipping status. After that, all you need to do is wait for your products to arrive.
What Should You Consider Before Making Custom Enamel Pins?
Before ordering custom enamel pins, you need to consider more than just the artwork and quantity. You should also think about the process, size, plating, back attachments, and number of colors. These details will affect the final appearance, production cost, and delivery time.
1. Soft Enamel or Hard Enamel?
Enamel pins are mainly divided into soft enamel and hard enamel.
Soft enamel is the more common option. The metal lines are slightly raised, while the enamel color areas are slightly recessed. This creates a clear 3D texture and bright colors, making soft enamel suitable for brand promotion, event giveaways, and most commercial custom projects.
Hard enamel has a smoother and flatter surface. It looks more refined and offers better durability and color longevity, making it suitable for premium gifts, long-term wear, or collectible items. However, hard enamel usually costs more, and the available color options may be relatively more limited.
If you want a more affordable option with bright colors and a textured feel, soft enamel is usually a better choice. If you prefer a smoother surface, higher durability, and a more premium look, hard enamel may be more suitable.
2. Choose the Right Plating Color
Common plating colors include gold, silver, nickel, copper, black nickel, antique gold, antique silver, antique copper, rose gold, and rainbow plating. Gold and silver are classic and clean, black nickel has a more modern look, antique gold and antique silver are suitable for vintage or commemorative designs, and rainbow plating is great for personalized projects.
If your design requires dual plating, you should ask the supplier in advance whether the design is suitable for it. In general, silver is not always recommended as one of the colors in dual plating because the visual contrast may not be strong enough, or the production stability may not be as good as nickel. In many cases, nickel can be used instead of silver. It keeps a similar silver-like appearance while being more suitable for the dual-plating process.
3. Confirm the Right Size
The size directly affects the clarity and overall proportion of the pin. If the pin is too small, text and details may become crowded. If the pin is too large while the design is simple, the finished product may look empty.
Common sizes include 0.75 inch, 1 inch, 1.25 inch, 1.5 inch, and 2 inch. For most logos, cartoon characters, event souvenirs, and brand promotion designs, around 1.25 inch is usually a balanced choice. If the design includes more text or complex details, you may consider 1.5 inch or a larger size.
4. Choose the Back Attachment
Common back attachments include metal butterfly clutches, rubber clutches, magnets, safety pins, and deluxe locking clutches. Metal butterfly clutches and rubber clutches are the most commonly used and usually do not require an extra charge. Special attachments such as magnets, safety pins, and deluxe locking clutches usually come with additional costs.
If you do not want to leave pinholes in clothing, you can choose magnets. If the pin is larger or requires stronger fastening, you can choose a safety pin or deluxe locking clutch. Before placing an order, it is best to tell the supplier where the pin will mainly be used. This will make it easier to choose the right attachment.
5. Control Enamel Colors and Details
More colors do not always make a pin look better. The smaller the pin size, the more limited the color areas will be. If there are too many colors, the filled areas may become too small and fragmented. This not only increases cost and production difficulty but may also make the overall design look messy and less focused.
It is better to prioritize the main brand colors, core graphic colors, and necessary text colors. If your design includes gradients, shadows, photo effects, or very delicate color transitions, the supplier may recommend switching to a printed process or simplifying the design. Text also requires special attention. If the font is too small or the lines are too thin, the final product may not be clear.
How Does a Factory Produce Enamel Pins?
After the customer approves the production artwork and completes payment, the factory will begin production according to the final design. The common enamel pin production process usually includes the following steps:
1. Mold Making
The factory creates a mold based on the approved production artwork. The mold determines the pin’s shape, metal lines, and raised or recessed structure. It also affects how clearly the finished details can be shown.
2. Stamping and Trimming
After the mold is completed, the factory stamps the design onto the metal material and cuts the pin according to the required shape. The metal blanks are then trimmed and polished to make the edges smoother and the surface cleaner.
3. Plating
After polishing, the pins go through the plating process. Common plating colors include gold, silver, nickel, black nickel, antique gold, antique silver, antique copper, rose gold, and rainbow plating. The plating color directly affects the overall style of the finished product.
4. Enamel Color Filling
After plating, workers fill the enamel colors into the designated areas according to the production artwork. Soft enamel usually keeps a noticeable raised-and-recessed texture, while hard enamel goes through further polishing to create a smoother and flatter surface.
5. Optional Processes and Attachment Installation
If the customer has special requirements, the factory can add processes such as back laser engraving, printing, numbering, logo engraving, or website engraving. Please note that back laser engraving is usually considered an extra process and generally comes with an additional cost.
After that, the factory installs metal butterfly clutches, rubber clutches, magnets, safety pins, or other back attachments.
6. Quality Inspection, Packaging, and Shipping
After production is complete, the factory checks the colors, size, plating, attachments, and surface quality to confirm that the finished pins match the approved production artwork. Qualified products are then packaged according to the customer’s requirements and shipped via FedEx, DHL, UPS, or other carriers.
Where to Make Enamel Pins?
Making custom enamel pins is not just about submitting a design. From the initial design idea to selecting the process, confirming the size, choosing the plating color and back attachment, approving the production artwork, and completing factory production, every step affects the final result.
If this is your first time ordering custom enamel pins, we recommend preparing your design sketch, reference images, size, quantity, and target delivery time before contacting a supplier. This will help you get a more accurate quote and reduce communication errors, revisions, and unnecessary delays.
A reliable supplier should not only help you complete production but also provide professional advice on design, process selection, and detail confirmation, helping turn your idea into a high-quality finished product more smoothly.
At VeperPins, we have not only a professional sales and design team but also our own factory. We provide one-stop custom services, from design suggestions, production artwork, and process selection to bulk production and international shipping.
Whether you are making enamel pins for a corporate event, brand promotion, Etsy shop, club, or personal project, VeperPins can help you turn your idea into a finished product with clear communication, professional artwork support, and reliable factory production.
FAQ About Making Enamel Pins
Can I make enamel pins at home?
No, it is not recommended to make enamel pins completely at home because the process requires professional equipment, including mold making, stamping, plating, enamel filling, polishing, and quality inspection. You can prepare the design idea or sketch at home, but production is best handled by a professional supplier.
What is the minimum order quantity for custom enamel pins?
The minimum order quantity for custom enamel pins usually starts from 50 pieces. Different suppliers may have different requirements, and the unit price is usually lower when you order a larger quantity.
How long does it take to make enamel pins?
For a standard design, enamel pin production usually takes about 10–15 business days. If the design is complex, has many colors, or requires special processes, the production time may be longer.


